AP Credit Memos can be entered in Restaurant365 to record any credits that are due. Credit Memos can then be applied to Open AP Invoices. If the Credit Memo has a 'Document Issues' tab listed, click here to learn how to resolve Document Issues.
This article covers the following topics:
- Navigation
- Security
- AP Credit Memo Header
- AP Credit Memo Details
- Edit an Approved AP Credit Memo
- Dates of Service
- Applying Credit Memo to Open AP Invoices
Navigation

To record an AP Credit Memo, hover over the ‘Vendor’ menu in the top ribbon and select ‘ Credit Memo’.
Note: Vendor credits issued as a check or ACH follow a unique process when entered in R365. Click here to learn how to reconcile these Check or ACH Vendor credits.
Security
The Permissions listed here are associated with AP Credit Memos within Accounting. These Permissions can be added to Custom User Roles or single Users. Learn more about managing Permissions and Custom User Roles here.
Important Note: These Permission are for Accounting only and do not provide access to AP Credit Memos within Smart Ops.
AP Credit Memos Permissions are found in the Permission Tree as follows:
- Accounts Payable
- AP Credit Memos
- View AP Credit Memos Within Accounting
- Edit AP Credit Memos
- Create AP Credit Memos
- Approve AP Credit Memos
- Unapprove AP Credit Memos
- Void AP Credit Memos
- Unvoid AP Credit Memos
- Delete AP Credit Memos
- AP Credit Memos
The Permission Access report can be used to determine which User Roles or Users already have these Permissions assigned.
Learn more about User Setup and Security here.
AP Credit Memo Header

1) Location - The Location that will appear on the header of the CM. This will default to the User's default Location, but can be changed if needed. Once changed, the 'Location' field in the Details grid below will also update the selected Location. Click here to change a default Location Click here to change a default Location
- Note: Locations will be grayed out if they are inactivated. Click here to learn how to inactivate a Location
2) Vendor - The name of the Vendor from which the CM was received. Once selected, the Vendor address will be noted below 'AP Credit Memo' in the top ribbon and any necessary 1099 information from the Vendor record will be listed next to the GL Date. This provides necessary information at a quick glance
- Note: Depending on the Vendor Entry method (set on the Vendor record), the details grid will be set to 'Account' or 'Item'. When entering the details by Item, you'll be able to credit back to the exact inventory item if your Vendor has the Entry method set to 'By Item'
3) Credit Number - The Credit Memo number. If no CM Number is available, create one
4) Document Date - The date listed on the CM
5) GL Date - The date the CM posts to the General Ledger
- Note: When this date is different than the Document Date, an orange exclamation point
 will appear, bringing attention to the fact that there is a difference between the two dates
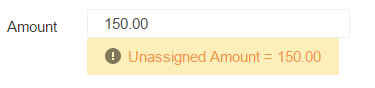
6) Amount - The CM Total Amount. Upon entry, an 'Unassigned Amount' warning will appear. This warning will remain until the Amount is equal to the total details amount in the Details grid
7) Status - This is the Transaction Status and Operations Status of the AP Credit Memo
- Note: Transaction Status will be 'Approved' or 'Unapproved'
- Once the Transaction is approved, the Operations Status will automatically be marked as 'Completed'
- Note: Operations Status will be 'Completed' or 'In Progress'
- An AP Credit Memo marked as 'Completed' is ready for processing
- An AP Credit Memo is not required to be 'Completed' in order to be processed in Accounting
8) 1099 Amount - This amount equals the Document Amount field until it is manually changed. If a Credit Memo is duplicated and the 1099 amount is not equal to the Document Amount, the 1099 amount does not automatically update. If the 1099 Amount does not equal the Document Amount, an orange exclamation point will appear, bringing attention to the fact that there is a difference between the two amounts. A document cannot be Saved or Approved if the 1099 Amount is greater than the Document Amount or the 1099 Amount is less than $0
- Note: This box appears when the Vendor is a 1099 Vendor, as noted on the Vendor record, and on approved transactions even after the Vendor is updated to not be a 1099 Vendor
9) 1099 Form - This field will auto-populate with the type of 1099 Form selected as the default form on the Vendor record. The drop-down selector displays the forms marked as 'Active' on the Vendor record that can be selected and used for this transaction
- Note: This box only appears when the Vendor is a 1099 Vendor
10) 1099 Box - This field will auto-populate to the default 1099 Box noted on the Vendor record. The drop-down selector lists all boxes for the selected 1099 Form, which can be updated if the 'Allow Box Override' checkbox is checked on the Vendor record. Otherwise, this field cannot be updated
- Note: This box only appears when the Vendor is a 1099 Vendor
11) Comment - An optional field that is useful for adding additional notes about the CM
AP Credit Memo Details
Credit Memo details can be entered in two different ways: Entry by Account or Entry by Item. Both ways are detailed out below.
Entry by Account

1) GL Account Selector - Enter the details of the CM starting with the First GL Account
2) Amount - The line item detail amount
3) Comment - The line item detail comment (optional)
4) Location Selector - The line item detail Location (will default to the Location in the header, but can be changed)
5) Start Date of Service - The date that the range of service begins. This is optional and could be used to record the specific date for a refund / credit of service. This will be explained further in the section below
6) End Date of Service - The date that the range of service ends. This is optional and could be used to record the specific date for a refund / credit of service. This will be explained further in the section below
7) Add / Clear Button - This will either add or delete the information from the line. If added, the line will appear in the grid
8) Upload File - This enables the User to upload a file from their device
9) Attach from Documents - This will appear if the User has the necessary security access. This enables the User to attach a document from Documents to Process
When all items are correctly entered, ensure that the Credit Memo is saved.
Entry by Item

1) Item - The item from the Credit memo. The system will search for all items that include the letters entered
- Note: AP Entry Users can select 'Missing Item' from this selector if the item is not set up in R365. Once saved, a 'Missing Items' tab will appear where a higher level Accounting User can review and assign the Missing Item in R365. Click here to learn more information about Missing Items
2) Vendor Item - This field will pre-populate based on the setup information for this item
3) U of M - This field will pre-populate based on the setup information for this item
4) Quantity - The quantity of the item
5) Each Amount - This field will be pre-populated based on the setup information for this item
6) Total - The generated amount from the quantity entered (Quantity x Each Amount)
7) Account - This field will pre-populate based on the setup information for this item
8) Location - The Location and Legal Entity that is receiving this Credit Memo. This will auto-populate to reflect the Location listed on the header, but if the listed Location is changed, this field will display the updated Location
9) Start Date of Service - The date that the range of service begins. Learn more about Dates of Service below
- Note: If legacy data was entered before the replacement of the 'Accrual' tab, older AP Credit Memos will automatically save their Dates of Service under the 'Details' tab
10) End Date of Service - The date that the range of service ends. Learn more about Dates of Service below
- Note: If legacy data was entered before the replacement of the 'Accrual' tab, older AP Credit Memos will automatically save their Dates of Service under the 'Details' tab
11) Add / Clear Button - This will either add or clear the information from the line. If added, the line will appear in the grid
12) Upload File - This enables the User to upload a file from their device
13) Attach from Documents - This will appear if the User has the necessary security access. This enables the User to attach a document from Documents to Process
When all items are correctly entered, ensure that the Credit Memo is saved.
Edit an Approved AP Credit Memo
Users with the 'Unapprove AP' Secondary Security Role will have the ability to edit an Approved Credit Memo without the need to Unapprove first.

Simply click the 'Edit' button above the Details grid, make any necessary updates, and then click 'Edit Complete' to save the changes made.
Dates of Service

Dates of Service allow a User to record expenses and credits in the right period even though the Dates of Service may expand over multiple months. To activate this feature, hover over 'Administration' in the top ribbon and click 'Preferences'.

When the 'System Preferences' window opens, navigate to the 'Miscellaneous' tab, and at the bottom right-hand corner of the header, click 'Display Accrual During AP Entry'. This will enable the Dates of Service appear on the AP Invoice and AP Credit Memo forms.

Dates that are added into an AP Credit Memo can be viewed in the 'Transaction Details' list with two postings made to their GL Accounts and their Start Date and End Dates posted in their respective date columns. These transactions can be exported and used to calculate a User's accrual.
Applying Credit Memo to Open AP Invoices
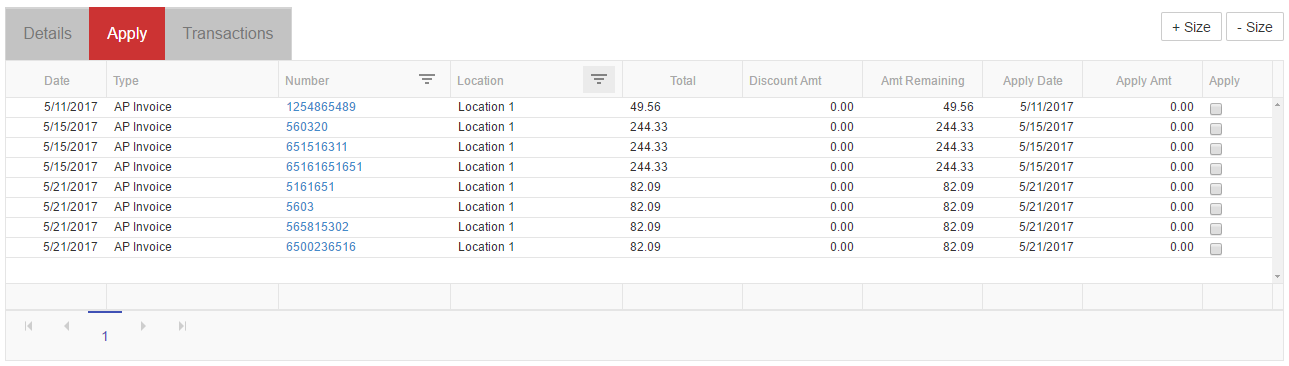
Before Approving the Credit Memo, the User has the option of Applying the Credit Memo to an Open AP Invoice on the 'Apply' tab. All Open AP Transactions for the selected Vendor will be displayed here.

Check the box on the AP Invoice line in the 'Apply column to apply the Credit Memo to the specified invoice. If the desired checkbox appears grayed out, it is due to the AP Invoice being partially applied to the Credit Memo prior to the invoice being placed on hold. Click here to learn more about Payment Holds.
Now that the Credit Memo has been applied, it is ready to be saved and approved.