Matching transactions in Bank Activity makes the Bank Reconciliation process easier. Once your Bank Accounts are set up, then Bank Activity can be pulled and matched. This process consists of the following steps:
- Navigate to Bank Activity
- Update Bank Activity. Bank Activity can be updated in one of three ways:
- Manual Upload - Download activity from your Bank (.qfx or .qbo file formats only) and then upload the file on the Bank Activity screen (this will attempt to Auto-match the Bank Transaction with its corresponding R365 Transaction, if it has previously been entered)
- Direct Bank Connection - Connect your bank accounts to R365 and refresh their transaction details with a simple click of the 'Retrieve Activity' button
- BAI File Transmission - Create a direct link to your bank(s) where transaction details will automatically pull into Bank Activity without User intervention
- Auto-Match
- Review and Update Records that were not Auto-Matched
- Clearing the 'Unmatched' tab
These steps are further elaborated on below. Scroll down to view all steps or click the desired step above to jump to its section.
Step 1 - Navigate to Bank Activity and Select the Bank Account
- Open Bank Activity by hovering over the Banking option in the top menu and selecting Get Bank Activity.

- From the Bank Account drop-down, select the bank account for which to retrieve activity.

- (Optional) Select Match Undeposited Funds to match existing transactions to the bank activity.
If selected, the auto-matching logic will first try to match transactions in the system for this bank account, and if it does not find a match, it will then try to match this record to transactions in the system that were posted to the Undeposited Funds account. If it does find a match in Undeposited Funds, it will change the Account from 'Undeposited Funds' to the Bank Account and then perform the Auto-match. It will not match to Undeposited Funds in a closed period.

Step 2 - Import Bank Activity from your Bank
Users can import bank activity into R365 using one of two methods:
- Method 1 - R365 Direct Bank Connection - Download activity from your bank and upload into R365.
- Method 2 - Manual Export & Import (.QBO / .QFX file) - Manually export activity from the bank and then upload it into Bank Activity.
Step 3 - Auto-Match
Once the transactions have been imported, Bank Activity performs auto-matching. The auto-matching logic attempts to match each activity record with a transaction in the system (auto-matching logic is outlined at the end of this article).
- Successful Matching - Records that are successfully auto-matched move to the Matched/Excluded tab.
- Unsuccessful Matching - Records that did not auto-match to an existing transaction will have one of two actions occur:
- The auto-match process attempts to match the activity against the conditions set on previously created bank rules. If the activity meets the conditions, it moves to the Rule Applied tab.
- If the activity does not auto-match and does not meet any bank rule conditions, it remains on the Unmatched tab to await processing.
File Incorrectly Uploaded
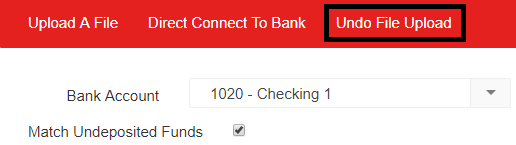
If a Bank Activity file was manually uploaded to the wrong bank account (not applicable to Direct Bank Connections) or otherwise incorrectly uploaded, select Undo File Upload to open the Undo File Upload prompt.
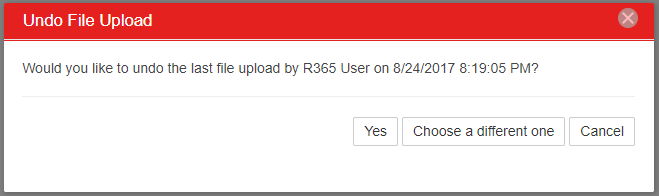
The prompt displays the most recently uploaded Bank Activity file and ask if the file should be removed. Select Yes to remove the upload, otherwise click Choose a different one to review and select a different upload file.
Step 4 - Manually Addressing Activity That Did Not Auto-Match
In this step, unmatched activity from the Unmatched tab is reviewed and manually matched, excluded, deleted, or added.
Manually Matching Bank Records to R365 Transactions

If there is a possible match in the system but the match was not close enough to be auto-matched, a potential match is indicated with an 'M' at the end of the row. Reasons for possible matches include:
- Same Amount and Multiple Transactions - There are multiple transactions in the system for the same amount.
- Same Amount and One Transaction - There are multiple bank activity records imported with the same amount and only one R365 transaction for that amount in the system.
To see the possible matches, click the arrow on the far left of the row to expand the row and view the list. Select Match on the far right of the row to match the record. The record moves to the Matched/Excluded tab. Collapse the row by clicking the same arrow.
Excluding Bank Records from Bank Activity

Records that are not intended to be included or that have already been reconciled manually can be removed by selecting their respective line and then in the Select Command drop-down and choosing Exclude Selected. The rows move to the Matched/Excluded tab.
To move an excluded record back to the Unmatched tab from the Matched/Excluded tab, select the Include button on the 'Matched/Excluded' tab.
Deleting Bank Records from Bank Activity

If you are confident that the record will not need to be included or matched again, from the Select Command drop-down, select Delete Selected to permanently remove the bank activity record.
Create Transactions
There are three types of transactions that can be created from Bank Activity:
- Simple transactions involve one GL account and one location.
- Regular transactions might involve multiple GL accounts and/or multiple locations.
- AP Payments
Create a Simple Transaction
- Populate the Vendor on the activity row.
This field is optional and only applies to Withdrawals (not Deposits).
If you select a vendor that has a Default Expense Account, the Account column populates automatically. - Set or change the Account on the Activity row.
This is required and must be populated on both Withdrawals and Deposits before they can be created. - Set or change the Location. This will default to the Location on the Bank Account and is a required field.
- (Optional) Select the Add Rule checkbox if you want a bank rule created.
By default, Add Rule is not selected, which means a new bank rule will not be created.
If selected, any other activity records with characteristics matching the new bank rule are automatically moved to the Rule Applied tab. - Add the transaction. Transactions can be added individually or in bulk.
- Select Add to add the single transaction immediately.
- Select each activity record row and choose Add Selected from the Select Command drop-down to add transactions in bulk. Each selected transaction is added and any rows with Add Rule checkbox selected create new Bank Rules.

Create a Regular Transaction
For Transactions that require multiple GL accounts or locations, instead of populating values on the activity row, select the Withdrawal or Deposit button.
A Withdrawal or Deposit window appears in a pop-up where you can create the transaction with as much detail as needed.
When you have entered all of the details, select Create Withdrawal or Create Deposit in the upper left corner of the window to create the transaction and move the activity row to the Matched/Excluded tab.
Create an AP Payment
If Bank Activity pulls in a withdrawal that does not match any existing payment in R365, an AP Payment can be created using the information gathered from the bank.
Select the AP Payment button in the row for the withdrawal to open the AP Payment record.
Several fields are automatically populated with information from the bank activity.
Complete any additional fields then select Create Payment to save the new transaction.
For more information, see Create AP Payment from Bank Activity.
Step 5 - Clearing the Unmatched Tab

If any activity records remain after all desired transactions are created and matched on the Unmatched tab, leftover records can be moved to the Matched / Excluded tab by clicking the Remove All Unmatched button near the top of the Bank Activity page.
All remaining records are moved to the Matched/Excluded tab and will be removed from Bank Activity 10 days after being moved to this tab.
Important Note: Before selecting Remove All Unmatched, make sure there are no records on the Unmatched tab that should be matched. Selecting this button will remove all records from the tab.