Payroll journal entries record journal entries that are imported from your organization's third-party payroll provider and are used to reconcile labor accrual entries imported from the POS for each day of the pay period.
There are three unique fields on a payroll journal entry transaction that set it apart from a normal journal entry transaction:
- Payroll Start Date - Records the start date for the pay period.
- Payroll End Date - Records the end date for the pay period.
- The Payroll Estimate Clearing tab - Displays the reversing entry of all the labor accrual entries.
Labor accrual entries are created using two sources:
Hourly Wages - Imported through the POS integration and created by matching job titles and labor punches. Salaried Wages - Set using the Daily Manager Salary field on the Labor Estimate tab of the Location record.
Prerequisites
Ensure that all related daily sales summaries are approved before creating a payroll journal entry. If all of the Labor information is not approved, the payroll journal entry will not clear out the accrued payroll account properly. More information on this topic is explained in the 'Approving a Payroll Journal Entry' section below.
Navigation
A blank Journal Entry record opens in a new tab.

Fields and controls on the Payroll Journal Entry record

| Field | Description | |
| 1 | Save | Provides the following options for saving the record:
|
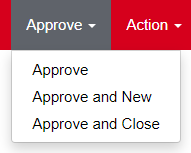
| 2 | Approve | Provides the following options for approving the record:
|
| 3 | Action | Provides the following actions that can be performed on the record:
|
| 4 | Date | Date of the journal entry. For most payroll journal entries, this is the same as the last day of the pay period in which the transaction is recorded. Default: Today's date. |
| 5 | Location | Location to which the payroll journal entry is assigned. For most payroll journal entries, this is the corporate locate of the legal entity that owns the account from which funds are withdrawn. Individual payroll expenses are broken down by more specific locations in the Details tab. Note: If your company does one payroll entry per legal entity, then all locations can be cleared for the legal entity in the same entry. To set this preference, navigate to the Miscellaneous tab of System Preferences and set Payroll Clearing to Per Location or Per Legal Entity. |
| 6 | Link to Asset | When selected, items in the Details tab can be linked to assets. |
| 7 | Number | A system-generated number used to identify the transaction. |
| 8 | Comment | An optional field where the user can enter comments about the journal entry. |
| 9 | Type | Type of journal entry. For payroll journal entries, this field is set to Payroll and is read-only. When importing journal entry data, Payroll must be written in the Type column for the import to be successful. |
| 10 | Payroll Start Date | First date included in the pay period. |
| 11 | Payroll End Date | Last date included in the payroll period. |
| 12 | Tabs | The Payroll Journal Entry record includes three tabs on which additional information can be entered:
|
| 13 | Upload File | Opens a file manager window from which the user can import journal entry data from their device. |
Importing a Payroll Journal Entry
- To begin importing a payroll journal entry, download the Payroll JE Import Template.
- Using the template, enter the necessary payroll information.
- In the Type column, enter 'Payroll' for each row.
(Otherwise, the file imports as a standard journal entry.) In the top ribbon menu, hover over the Account option and select Import Journal Entry.
The Import Journal Entry page opens in a new tab.(Optional) Select Import as Approved to mark the new payroll journal entry as approved upon creation. Select Payroll Journal Entry to indicate that the file should create a payroll journal entry.
Two new fields appear: Payroll Start Date and Payroll End Date.In the Payroll Start Date field, enter the first date of the pay period in which to record the payroll journal entry. In the Payroll End Date field, enter the last date of the pay period in which to record the payroll journal entry. Click Select Files.
A file manager window opens.Select the file to import from your device.
The page updates to display the status of the import.

Approving a Payroll Journal Entry
Approving a Payroll Journal Entry
Correcting Approvals
Another Sample Payroll Journal Entry
After running payroll through the payroll provider, import (or enter) a journal entry that has the summary of the expense accounts (FOH, BOH, Manager, etc.) and a single line for each employee's net pay (the amount for each check that will clear the bank) into R365. By doing this, we can use R365's Bank Reconciliation to reconcile the payroll account and capture actual payroll expenses.
The lines below display sample entries for each payment run using an example of 3 locations (with one corporate location where executive and administrative salaries are booked). The amounts credited to the payroll checking account automatically create withdrawal entries in Bank Reconciliation and are automatically reconciled when bank activity is imported into R365:
Debit $1,000 FOH Hourly Wages Expense – Location A
Debit $1,000 FOH Hourly Wages Expense – Location B
Debit $1,000 BOH Hourly Wages Expense – Location A
Debit $1,000 BOH Hourly Wages Expense – Location B
Debit $1,000 Administrative Salaries Expense – Location Corporate
Debit $500 Taxes/Benefits/Insurance – Location A
Debit $500 Taxes/Benefits/Insurance – Location B
Debit $500 Taxes/Benefits/Insurance – Location Corporate
Credit $500 Payroll Checking Account – “Jane Doe” “Check 1123”
Credit $500 Payroll Checking Account – “Steve Smith” “Check 1124”
Credit $500 Payroll Checking Account – “Kobe Bryant” “Check 1125”
Credit $500 Payroll Checking Account – “Tim Duncan” “Check 1126”
Credit $500 Payroll Checking Account – “Steven Smith” “Check 1127”
Credit $500 Payroll Checking Account – “Parley Pratt” “Check 1128”
Credit $500 Payroll Checking Account – “Dan Jones” “Check 1129”
Credit $500 Payroll Checking Account – “Brittany Spears” “Check 1130”
Credit $500 Payroll Checking Account – “Elton John” “Check 1131”
Credit $500 Payroll Checking Account – “Steve Wonder” “Check 1131”
Credit $500 Payroll Checking Account – “Jim Kaa” “Check 1131”
Credit $500 Payroll Checking Account – “Carl Karcher” “Check 1131”
Credit $500 Payroll Checking Account – “Summer Harris” “Check 1131”
The entry will have a single row for each check sent out (the credits) and a row for the total expense by GL account by location (the debits). After running payroll just as you do today, you can either prepare this entry in Excel and import it into Restaurant365 or create a Memorized GL Transaction in Restaurant365. For each pay period, you update the dollar amounts and check numbers in the comment for each row.
Restaurant365 takes this entry and uses it to offset the labor accruals that come in daily from your POS system into Restuarant365. When you import or enter the journal entry above, you select the start and end date of the pay period for which it covers. The system then makes an adjustment to true up/down the accrued payroll expenses for the pay period. This way, you get the benefit of having weekly prime cost reports and having them totally accurate however often you run actual payroll.