The POS Integration settings on the Preference Screen can be accessed and updated by Usera with the following Permission:
- Administration → System Setup → System Preferences → View/Edit Miscellaneous Preferences
Click here for more information on POS Integration Settings
System Preferences
Several elements of the POS Integration Settings are managed on the 'Miscellaneous' tab of the 'Preferences' screen.
To open the 'Preferences' screen, hover over the ‘Administration’ menu in the top ribbon and select 'Preferences'
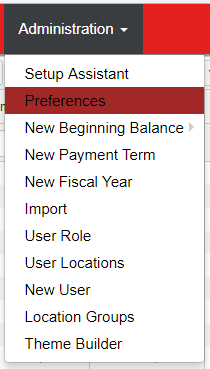
Doing so will open the 'Preferences' screen in a new tab. Upon loading, navigate to the ‘Miscellaneous’ tab to make any desired adjustments.

1) Employee Master - Select where your Employee Records will be managed. Options include:
- R365 - Within Restaurant365 (recommended for most Customers)
- Payroll System - Within a third party Payroll System
- POS - Within the POS
2) Discount Combined in JE - This setting combines any Discounts with the corresponding Sales represented to make a single transaction line item on the DSS Journal Entry. For this function to work correctly, ensure that the Discount's Payment Type has the same GL Account as its Sales Type Account. This box is unchecked by default and is recommended to remain unchecked
- Example: On a typical DSS Journal Entry, there is $100 Credited to Food Sales, and $90 Debited to Undeposited Funds along with $10 to Food Discount as shown below:

With the 'Discount Combined in JE' checkbox checked and the Food Discount's Payment Type set to the same GL Account as Food Sales, the Journal Entry would be amended. The $10 Debit to Food Discount would be combined with the $100 Credit to Food Sales, reducing the total amount to $90. The $90 Debit to Undeposited Funds would remain unchanged, as shown below:

3) Payment Type Separation - Payment Types are imported from the POS System and reflect the manner in which payment is received on a Sales Ticket. Payment Types must be mapped to a GL Account and Payment Group for DSS review.
- Note: Changing this setting after the initial POS Mapping has been completed will result in new Payment Types being created. These Payment Types would then need to be mapped as previous Payment Types would no longer be in effect. Additionally when a setting other than 'None' is selected, changing the Legal Entity or Location Name will result in new Payment Types being created, requiring each new Payment Type to be mapped.
Payment Type Separation allows the User to Separate Payment Types with the following options:
- None - All POS Systems and POS Integration Locations will use the same Payment Types with no Legal Entity / Location distinction. This is the default settings for Payment Type Separation, and should be sufficient for most Restaurant Groups. In cases where multiple concepts, or various POS Systems are being utilized, Payment Type Separation by Legal Entity or Location can be a valuable tool in assigning specific Payment Types to specific GL Accounts. This is not required however as every transaction in Restaurant365 has a Location associated with the transaction and will always allow the User to report based on the Location (or Legal Entity)
- Legal Entity - Each Payment Type will have the Legal Entity Name appended to the end of the Payment Type Account Name. For example: 'Visa' would become 'Visa - Legal Entity Name' etc.
- Location - Each Payment Type will have the Location Name appended to the front of the Payment Type Account Name. For example: 'Visa' would become 'Visa - Location Name' etc.
- POS Group - POS Groups can be created for the grouping of Concepts. Locations can then be added to those POS Groups. Selecting 'POS Group' will create Payment Type Separation for each POS Group. This setting is particularly useful for large organizations with multiple concepts. In place of managing several hundred Payment Types from across the entire organization, now they can be managed by Concept. Click here for more information on POS Groups
4) Menu Item Separation - similar to the Sales and Payment Type separation, Menu Item separation allows you to separate each menu item by Location, Legal Entity, or custom Location Reporting Category. The default setting is ‘None’ and will be sufficient for the majority of restaurant groups. This setting should only be used for groups with multiple concepts that have identical menu item names.
- None - the default setting. No separation will occur. Menu Items will be imported from the POS using the names that appear within the POS
- Location - each Menu Item will have the Location name appended to the Menu Item name. This will result in # of Locations times the number of Menu Items. So if you have 100 menu items and 5 Locations, you will have 500 Menu Items that can be assigned to Recipes
- Legal Entity - each Menu Item will have the Legal Entity name appended to the Menu Item name. This will result in # of Legal Entities times the number of Menu Items within each Legal Entity
- Location Reporting Categories - You can create custom Location Reporting Categories and assign Locations to be included in those categories on the Location Record. Separation will occur at the Location Reporting Category level. This is the preferred setup if multiple concepts are POS integrated. Click here for more information on Location Reporting Categories
5) Sales Account Separation - Sales Accounts are imported from the POS System and reflect the Service Type and Category of the Menu Items that appear on Sales Tickets. Sales Accounts must be mapped to a GL Account and assigned a Sales Account Type for DSS review.
- Note: Changing this setting after the initial POS Mapping has been completed will result in new Sales Accounts being created. These Sales Accounts would then need to be mapped as previous Sales Accounts would no longer be in effect. Additionally when a setting other than 'None' is selected, changing the Legal Entity or Location Name will result in new Sales Accounts being created, requiring each new Sales Account to be mapped.
Sales Account Separation allows the User to Separate Sales Accounts with the following options:
- None - All POS Systems and POS Integration Locations will use the same Sales Accounts with no Legal Entity / Location distinction. This is the default settings for Sales Account Separation, and should be sufficient for most Restaurant Groups. In cases where multiple concepts, or various POS Systems are being utilized, Sales Account Separation by Legal Entity or Location can be a valuable tool in assigning specific Sales Accounts to specific GL Accounts. This is not required however as every transaction in Restaurant365 has a Location associated with the transaction and will always allow the User to report based on the Location (or Legal Entity)
- Legal Entity - Each Sales Account will have the Legal Entity Name added to the middle of the Sales Account Name. For example: 'Dine In - Food' would become 'Dine In - Legal Entity Name - Food' etc.
- Location - Each Sales Account will have the Location Name added to the middle of the Sales Account Name. For example: 'Dine In - Food' would become 'Dine In - Location Name - Food' etc.
- Day Part - Sales Accounts will be broken out by Day Part. Each Day Part for each Location will have its respective Sales Account.
- Note: this setting will create up to 6 Sales Accounts per Sales Category/Service Type per Location depending on the number of Day Parts on the Location Records
- POS Group - POS Groups can be created for the grouping of Concepts. Locations can then be added to those POS Groups. Selecting 'POS Group' will create Sales Account Separation for each POS Group. This setting is particularly useful for large organizations with multiple concepts. In place of managing several hundred Sales Accounts from across the entire organization, now they can be managed by Concept. Click here for more information on POS Groups
6) POS Track Paidout - This setting enables a Paid Out logging feature that imports the Paid Out Types from the POS system. These Paid Out Types can then be mapped to GL Accounts for automatic Cost Account allocation during the DSS review process. Imported Paid Out Types can be found under the 'Paid Out Types' list in the 'Administration' section of the Accounting Module