Documents to Process allows users to upload a PDF or scanned image of an AP invoice (or AP credit memo) to the system and then enter the details of the transaction at a later time. The recommended file format for use in Documents to Process is PDF. Many vendors provide invoices electronically (in PDF form) while other vendors will only provide physical copies of invoices.
When physical invoices are received, a user can scan or take a photo of the invoice to create a PDF copy of the physical invoice. For example, a scanner used in conjunction with a computer, a scanner/copier, or the camera app on a mobile device can be used to produce a PDF, which can then be uploaded to the system.
There are many ways to upload a file to R365. One method is by using the FTP site that has been set up specifically for your organization by R365. A File Transfer Protocol (FTP) is a communication protocol used for the transfer of files from a server to a client on a computer network. In this case, the site allows users to transfer files from any device within your organization to R365.
Click here for more information on Documents to Process: Upload Methods.
Uploading Files via FTP
FTP Sites are created for each customer instance in R365. Follow the steps outlined in the FTP Site Overview to gain access to your unique FTP site.
Depending on the device (also known as the 'FTP client') that you are using to access the site, you might be able to drag and drop files directly into the FTP folder. As the majority of users use a Windows device, the instructions for adding files using Windows File Explorer are detailed below. For all other FTP clients, review the application documentation for the process of adding files to the FTP site once you have logged in to the FTP site.
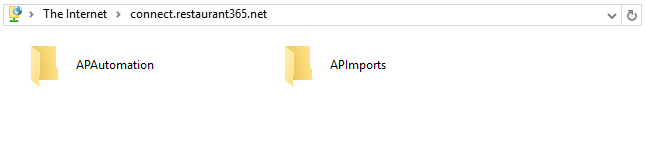
- Open the root directory of the FTP site.
- Using Windows File Explorer, open the root directory of the FTP site. This is the lowest level in the directory of the FTP site and is the location where all files will be placed (copy and pasted or drag and dropped) in to the FTP site.
- Using Windows File Explorer, open the root directory of the FTP site. This is the lowest level in the directory of the FTP site and is the location where all files will be placed (copy and pasted or drag and dropped) in to the FTP site.
- Copy and Paste or Drag and Drop desired files in to FTP root directory.
- Copy and Paste (or depending on the FTP client, Drag and Drop) desired files in to the root directory. Logic has been built in to the FTP site to recognize Supported File Types and route them to the correct destination folder. The following animated GIF demonstrates the drag and drop method, along with the FTP site refresh. Additionally, the GIF shows the user navigating to the 'Processed' folder within the 'Invoices' sub-directory.
- Note: Files placed in the root directory will be routed in to the 'Invoices' folder. To place files in specific folders, open the 'APAutomation' folder and copy and paste or drag and drop the desired files in to the specific folder.

- Note: Files placed in the root directory will be routed in to the 'Invoices' folder. To place files in specific folders, open the 'APAutomation' folder and copy and paste or drag and drop the desired files in to the specific folder.
- Copy and Paste (or depending on the FTP client, Drag and Drop) desired files in to the root directory. Logic has been built in to the FTP site to recognize Supported File Types and route them to the correct destination folder. The following animated GIF demonstrates the drag and drop method, along with the FTP site refresh. Additionally, the GIF shows the user navigating to the 'Processed' folder within the 'Invoices' sub-directory.
- Files will be imported in to Restaurant365 automatically.
- The FTP site monitors for changes frequently and processes/imports any new files upon discovery. Using Windows File Explorer, a user can immediately update the view by clicking the 'Refresh' arrow in the top of path bar (shown in the above GIF). Using the directory structure listed below, a user can navigate to the respective 'Processed' folder to verify that the file has been process properly.
- Note: If a file type other than those listed on Supported File Types is uploaded, the file will not process and will be routed to the 'ErrorLog' folder.

- Once all files have been automatically removed from the root directory (processed), the files will be available in Documents to Process in Restaurant365 upon hitting the refresh button in the top right corner of the Documents to Process window.
- Note: If a CSV file, in an approved EDI format, was uploaded, the result of the import will be the respective AP Transaction records in the All Transactions or AP Transactions list views in the Restaurant365 Accounting module.
- Note: If a file type other than those listed on Supported File Types is uploaded, the file will not process and will be routed to the 'ErrorLog' folder.
- The FTP site monitors for changes frequently and processes/imports any new files upon discovery. Using Windows File Explorer, a user can immediately update the view by clicking the 'Refresh' arrow in the top of path bar (shown in the above GIF). Using the directory structure listed below, a user can navigate to the respective 'Processed' folder to verify that the file has been process properly.