This article is part of the Catering module documentation. Click here for more information on the Catering module.
Catering Events are what drives all activity in the Catering module. Events are where your Catering Representatives will track catering opportunities from 'Prospect' all the way to 'Complete'. Catering Events appear on the Catering Calendar and the Catering Event list view.
Create Catering Event

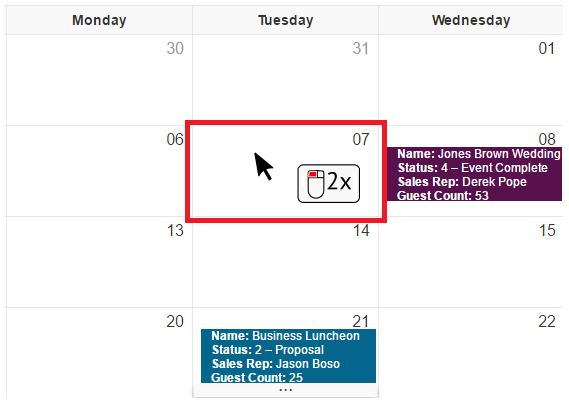
A User can create a Catering event in one of two ways: from the Catering options in the top ribbon or by double-clicking on a specific date in the Event Calendar. Each option will open the Catering Event record screen in a new tab.
Catering Event Record
The Catering Event record stores all of the information for a Catering Event and allow Users to track Catering Events from 'Proposal' to 'Billing Completed'. Upon opening/creating a Catering Event, the User will be brought to the 'General' tab of the Catering record. All subsequent tabs are accessible from this screen and will be detailed below.
Event Status and Event Actions

In addition to the tabs, two constant elements remain on the screen as the User navigates the different tabs in the Catering Event record, namely Status (#2) and Total / Total Per Guest (#3). Click here for more information on Catering Event Status. Additionally, there are several actions (#4) that are unique to Catering Events. Click here for more information on Catering Event Actions.
General Tab

1) Status - The Event Status is displayed in the area above the tabs in the Catering Event record on all tabs. To display the Status, click the carrot symbol next to 'Status'. Statuses will be covered in more detail in a subsequent section below
2) Event Name - Enter the Catering Event name in this field
3) Number - The number for this Catering Event will be generated per the Autonumbering in R365. The field is editable if you want to number the event otherwise. Click here for more information on Autonumbering
4) Customer - Enter the Customer in this field. If the Customer is new and has not previously been entered in to R365, a prompt will appear asking 'Do you want to add new customer?'. Clicking 'Yes' will open a New Customer prompt where the User can enter a new Customer
5) Booking Contact - Enter the Booking Contact in this field. If the Contact is new and has not previously been entered in to R365, a prompt will appear asking 'Do you want to add new contact?'. Clicking 'Yes' will open a New Contact prompt where the user can enter a new Contact
6) Contact Info - The values in this field will be populated from contact information of the Booking Contact. This is present for quick glance contact information of the Booking Contact of the Event
7) Event Date - The date of the Event
8) Estimated Guests - Enter in the quantity of Estimated Guests for the Event
9) Actual Guests - Upon completion of the Event, return to this screen to enter in the Actual number of Guests that attended the Event
10) Event Type - Select the Event Type in this field. Event Types are created and managed in Catering Settings
11) Source - Select the Source for the Catering Event. Sources are created and managed in Catering Settings
12) Catering Rep - Select the Catering Representative for this event. The default value in this field will be the user ID of the individual that created the new Catering Event
13) Location - Select the Location that the Catering Event pertains to
14) Site - Select the Site where the Event will take place. Click here for information on how to create and manage Sites
15) Site Address / Change Address - The default address of the Site will populate in this field upon selection of a Site. To manually change that address for this Event only and not on the Site record, click the 'Change Address' button. A prompt will appear where the user can update the Address
16) Room - If the Site selected has Rooms associated with it, the User will be able to select the Room that will be used for the Event. Click here for information on how to create and manage Rooms
17) Site Contact - Enter the Site Contact in this field (this may or may not be different from the Booking Contact). If the Contact is new and has not previously been entered in to Restaurant365, a prompt will appear asking 'Do you want to add new contact?'. Clicking 'Yes' will open a New Contact prompt where the user can enter a new Contact
18) Times - Start Time and End Time are default times established in Catering Settings. To have additional time display here, create the times in Catering Settings
19) Description - In this field the Catering Rep can enter in a description for the Event
20) Notes to Event Manager - Special notes can be left for the Catering Event Manger in this field
21) Total / Total Per Guest - Total / Total Per Guest is displayed in the area to the right of the tabs in the Catering Event record at all times. The Total is calculated based on the values entered on the 'Details' tab. Total Per Guest is calculated by taking the Total and dividing it by the Estimated Guests, and for final billing, by the Actual Guests
22) Action - There are several actions that are unique to Catering Events. These will be detailed in a subsequent section below
Details Tab
The 'Details' tab is where you can manage the Segments of a Catering Event, as well as add Catering Items, Catering Menu Items, and Custom Catering Items to a Catering Event.

1) Segment - Segments are displayed along the top of the 'Details' tab. When a Segment is selected, it will become blue. Click here for more information on Segments
2) Add new Segment - To create a new Segment, a User can click this button. Click here for more information on Segments
3) Add From Menu - To add Catering Menus or Catering Menu Items, use this button. Click here for more information on Catering Menus
4) Create Custom Item - To add a Custom Catering Item, use this button. lick here for more information on Catering Items
5) Item Grid - When a Segment is selected, the Catering Menu Items and Catering Items in that Segment will be displayed in this grid
6) Total - The total price for all of the Catering Menu Items and Catering Items in the selected Segment will be totaled here
Payments Tab
On the 'Payments' tab, a User can enter in Payments Expected as well as Payments Received. Payments expected are exclusively tied to the Catering Event record and have no effect on the accounting for the Catering Event.
Payments Received, however, do have an effect on the AR of the Catering Event and are recorded as AR payments when entered in to the 'Payments' tab. Click here for more information on Catering Payments.

1) Payments Expected - Add Payments Expected using the fields here. Click here for more information on Catering Payments
2) Payments Received - Add Payments Received using the fields here. Click here for more information on Catering Payments
3) Payment Expected List - Previously added Payments Expected will populate this list. Values in this list will be selectable as Payments in 'Payments Received'
4) Payments Received List - Payments Received will appear here upon adding them to the Catering Event record
5) AR Payment Record Links - Each Payment Received creates an AR Payment record that is accessible by double-clicking on the hyperlink in the 'Amount' field
6) Totals - The totals for each payment type appear at the bottom of the lists
Tax and Charge Tab
The 'Tax and Charge' tab is where the user will select, or update, the Item Types setup in Catering Settings for this Catering Event. A User will be able to select a template that was created in Catering Settings and make adjustments as needed.

To select an Item Type template, click the Select Template dropdown and click the desired template. This will populate all of the fields with the information previously stored in the template in Catering Settings. The Catering Rep can then make any needed changes to the percentage rates. Notice that Commission % is present on the above screenshot. Commission % is not editable and is displayed for reference.
Totals Tab

The Totals tab will display the cost / price breakdown by Item Type as well as the Amount Paid. The Item Type numbers are calculated using the percentages established on the 'Tax and Charge' tab as well as the Catering Menu Items and Catering Items entered on the 'Details' tab. The Paid amount and Remaining amount are calculated from the payments entered on the 'Payments' tab.
Shifts Tab
For restaurant organizations that are also utilizing the R365 Scheduling module, Scheduled Shifts can be added to a Catering Event on the 'Shifts' tab. The creation of shifts (while leaving the Employee value unassigned) will create an Unassigned Shift in the Scheduling module that a Scheduler can then assign to a qualified Employee. Click here for more information on the Scheduling module and Unassigned Shifts.

1) Select Job - Select the desired Job Title for the Shift that is being created. Click here for more information on Job Titles
2) Select Employee - The available Employees in this list will be predicated on the Job Title that was selected in the previous column. If you want the Scheduler to assign an Employee to this shift, leave this value blank and the Shift will be created as an Unassigned Shift. Click here for more information on Shifts
3) Date - The value in this field will default to the date of the event. Adjust as needed for the Shifts that will be necessary for the Catering Event
4) Start Time - The start time of the Catering Event Shift
5) End Time - The end time of the Catering Event Shift
6) Add/Clear Buttons - Upon completing the previous cells, click the 'Add' button to create a Shift and add it to the Catering Event. Click 'Clear' to clear the fields
7) Catering Event Shifts List - All Shifts that have been created for this Catering Event will be displayed in a list in this area
Contract Tab

The 'Contract' tab will default to the information provided in the 'Contract' tab of Catering Settings. Users will have the opportunity to make any necessary adjustments to the wording or contents of the Contract on this tab without altering the default wording in Catering Settings. Click here for more information on Catering Settings.