The article is part of the AP Center release.

The Documents Queue functions as part of the Documents to Process feature in R365 that allows Users to upload a PDF or scanned image of an AP Invoice (or AP Credit Memo) to the system and then enter the details of the transaction at a later time. This is different from the EDI process where Invoice details can be imported from a CSV file.
Documents to Process exists for the instances when an importable CSV format of an Invoice does not exist, and transaction details must be entered by a User into the system. Invoices are marked by priority, then date, and can be assigned to certain Users for future entry.
Documents can be uploaded, reviewed, edited, deleted, and merged directly within the Documents Queue tab. Clicking on the 'Create' button will take Users to the Document To Process page with the Document already selected to create a new Invoice.
This article reviews the following:
Security
The Permissions listed here are associated with Documents to Process. These Permissions can be added to Custom User Roles or single Users. Learn more about managing Permissions and Custom User Roles here.
Docs to Process Permissions are found in the Permission Tree as follows:
- Accounts Payable
- Docs To Process
- View Docs to Process within Accounting
- View Docs w/ Unassigned Location
- Edits Docs to Process Documents
- Delete Docs to Process Documents
- Docs To Process
- Food
- Docs to Process
- View Docs to Process Within Document Library
- View Docs w/Unassigned Location
- Edit Docs to Process Documents
- Upload Docs to Process Documents
- Delete Docs to Process Documents
- Docs to Process
Note: Users should only have Docs to Process Permissions from either 'Accounts Payable' or 'Food'. It is not necessary to assign both sets.
The Permission Access Report can be used to determine which User Roles or Users already have these Permissions assigned.
Learn more about User Setup and Security here.
Navigation

First, open the AP Center by clicking 'AP Center' under 'Accounts Payable' in the 'Accounting' module

Once the AP Center is open, click on the 'Documents Queue' tab.
Documents Queue Tab

Users can perform the following actions:
 - Search for specific keywords
 - Save/edit Table Views
 - Filter column information
 - Rearrange columns
 - Refresh
Learn more about working with Smart Grids here.
Uploading Documents
To upload additional documents to the Documents Queue, click the 'Upload Documents' button in the tab header. Learn more about uploading Documents here.

Documents Queue Columns
The Documents Queue has the following columns:
Bulk Edit Checkbox - Checking one or more checkboxes will open the Bulk Edit menu, which contains the following options:
- Edit Values
 - Enables the Document Type, Location, assigned User, and/or Priority of one or more Documents to be updated as needed
 - Merge Documents
 - Combines multiple files into a single manageable file
 - Attach to Existing Transaction
 - Opens a sidesheet displaying existing AP Transactions. The selected Documents can then be attached to an existing AP Invoice or Credit Memo.
 - Archive
 - Marks the file as a duplicate and moves it from the main listing to the 'Archive' view
 - Delete
 - Removes the file from the 'Documents to Process' window
Priority - Click this arrow to mark an AP Invoice or Credit Memo as a priority. When hovering over this area next to a document, an arrow will appear that can be clicked.
File Name - The name of the Document
Assigned To - The Employee assigned to inputting the transaction details into R365. This column can be filtered for all Users who have access to Documents to Process.
Created On - The date the upload was made
Pages - The number of pages for that Document
Location - The Location assigned to the Document. This column can be filtered for all Locations.
Age - Time passed since the 'Created On'reated of date of the Document
Issues - Any notes added that explain issues with the upload. This can be manually entered by the User. This column can be filtered for all issues.
Document Type - The type of document uploaded. Documents will either be labeled as AP Invoice or Credit Memo
Comments - Click to view and add comments. Indicates the number of comments added to the associated document. If no comments have been added, 'Add Comment' will be displayed. Learn more about Docs to Process Comments here.
- Note: Docs to Process Comments are only viewable within Docs to Process.
Actions / Create - This button will send the User directly to an AP Invoice/Credit Memo form when clicked. To avoid two Users entering an AP Invoice and/or Credit Memo at once, enable Document Locking on the 'Miscellaneous' tab of System Preferences.
- Note: Locked Documents will display a greyed-out
 in place of the 'Create' button. However, if a User is inactive for more than 30 minutes while entering a transaction, the transaction details will not be saved and the 'Create' button will be clickable again. More details about the 'Create' button are explained in the section below.
 Delete - Click to delete the associated Document
Reviewing Single Documents
To open a preview of the Document, click the filename. This will open the Document sidesheet. Clicking the filename a second time will close the sidesheet.

Adding Issues
If issues are found with the Document, click '+ADD ISSUE'.

Issues can be selected from the list or added manually.

Creating Invoices
To create an Invoice for a Document, click the 'CREATE' button. This will open the AP Invoice form in a new tab.
The 'CREATE' button can be found at the top of the sidesheet or in line with the Document.

Bulk Edit

The Bulk Edit menu allows the User to edit Document details, attach to existing AP Invoices or Credit Memos, and delete, merge, or archive the selected Documents.
Clicking on one or more of the checkboxes in line with the Documents will open the Bulk Edit menu. Actions taken in the Bulk Edit menu will apply to all of the selected Documents.

Edit
Click on the pencil icon to edit the following Document details:
- Document Type - Choose from Invoice or Credit Memo
- Location
- User
- Priority

Click  to save and apply changes, or click the
  button to close without saving.
Attach to Existing
Click the 'Attach to Existing' icon  to open a sidesheet with existing AP transactions.

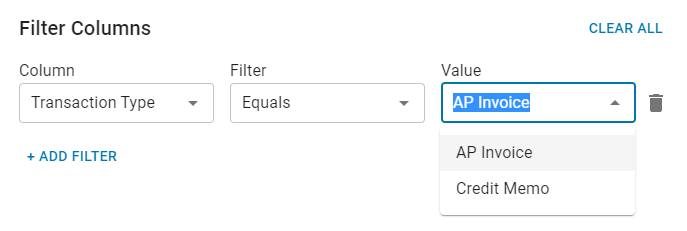
This list is filtered for AP Invoices by default. To view Credit Memos, change the filter from 'AP Invoice' to 'Credit Memo'.
Click  to attach the selected Document to the desired AP Invoice or Credit Memo.
Merge
Click the merge icon to merge the selected Documents.
- Note: If the Documents cannot be merged, a notification will appear when hovering over the merge icon.
- Note: If the Documents have conflicting Locations, Document Types, or 'Assigned To' details, a confirmation window will ask if the conflicting value should be removed. If merged, the Document will need to have the conflicting field manually re-entered.

Archive
Click the archive icon to archive the selected Documents.

Click  to archive the Documents, or
  to close without archiving.
Delete
Click the trashcan icon to delete the selected Documents.

Click  to confirm and permanently delete the Documents, or click
 to close without deleting.