The POS Integration is governed by a number of Settings in Restaurant365. These settings reside on various screens. Click here for more information on POS Integration Settings.

POS Groups are groupings of Concepts or POS Systems. POS Groups are exclusively used as a form of POS System Payment Type Separation and POS System Sales Account Separation. Separating Payment Types / Sales Accounts by POS Group is particularly useful for large organizations with multiple concepts.
In place of managing several hundred Payment Types or Sales Accounts from across the entire organization, now Payment Types and Sales Accounts can be managed by Concept through POS Groups.
Security
The Permissions listed here are associated with POS Location Groups. These Permissions can be added to Custom User Roles or single Users. Learn more about managing Permissions and Custom User Roles here.
POS Location Group Permissions are found in the Permission Tree as follows:
- Administration
- POS Management
- Location POS Groups
- View Location POS Groups
- Edit Location POS Groups
- Create Location POS Groups
- Delete Location POS Groups
- Location POS Groups
- POS Management
The Permission Access Report can be used to determine which User Roles or Users already have these Permissions assigned.
Learn more about User Setup and Security here.
Steps to Create and Assign POS Groups
Step 1 - Select 'POS Group' in the Payment Type Separation Setting

In order to create POS Groups, a User with the Secondary Security Role User Setup must navigate to System Preferences and select 'POS Groups' for either:
Once selected, save System Preferences and this will enable the 'POS Group' selector to be included on the Location record.
Step 2 - Create POS Group via Location Record Quick Add

POS Groups can only be created via 'quick add'. This is functionality that is common throughout Restaurant365 where the User enters values in a field then hits 'Enter' or 'Tab' and the System prompts the User if they want to create the record.
Navigate to the 'POS Integration Settings' tab of the Location record . The 'POS Group' field should be visible below the 'POS Import Start' field If 'POS Group' is not visible, please ensure that Step 1 was completed properly.
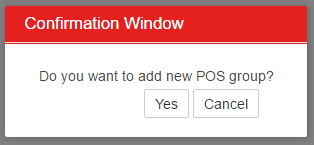
Begin typing the name of the desired POS Group in the 'POS Group' field. Click 'Enter' or 'Tab' when complete. A quick add prompt will appear confirming that you want to add this new POS group.

After clicking 'Yes', the POS Group Add/Edit Form will appear where you will adjust the name accordingly and save the POS Group. Add all desired POS Groups using this method.

Each POS Group that is created will be available for review, or if necessary, deletion, via the 'Location POS Group' list view, located in the 'Administration' section of the Accounting module.
Step 3 - Assign POS Group on Location Record
Open each Location and update the 'POS Group' field with the desired POS Group that was created in Step 2. Save the Location record.
With the above settings in place, the POS Group Payment Type Separation / POS Group Sales Account Separation will function properly.