Restaurant365 comes with an Import Tool, which allows end Users to import many types of records, such as Vendors, GL Accounts, Items, Beginning Balances, Recipes, Item Locations, Vendor Items, and more. These imports can create new records or update existing records.
Check out the video above or review the steps below to learn the import process and some Tips and Tricks on creating a successful import.
Security
Users with the following Permission will be able to access the Import Tool:
- Administration → System Setup → Use Import Tool
The Import Tool can be used to update or create multiple types of records. Only the record types that the User has the 'Edit' Permissions for will be available in the Import Tool.
- For example: The 'Purchased Item' record type will only appear in the 'Options' drop-down menu if the User has the 'Edit' Permission for 'Purchased Items' (Food → Purchased Items → Edit Purchased Items)
Learn more about managing Permissions and Custom User Roles here. The Permission Access report can be used to determine which User Roles or Users already have these Permissions assigned.
Create an Import
Classic

To access the import tool, navigate to the 'Administration' menu in the top ribbon and select 'Import'. From the Import window, Users will need to navigate through three tabs.
Smart Ops

To access the Import Tool from Smart Ops, click 'Import' under 'Admin' in the Smart Ops left navigation menu.
Upload File Tab
The 'Upload File' tab is where the desired record template can be downloaded, edited, and uploaded. The fields on this tab enable the User to download existing information to update current records or a new template to create new records.

1) Options - A list of different record types to import (Vendor, Purchased Item, etc)
- Note: Only the record types that the User has the 'Edit' Permissions for will be available in the Import Tool. Learn more about managing Permissions here.
2) Type - Select if the import will create new records or update existing records in the system
3) Upload File Button - Allows you to browse and select the file you wish to import. This isn't active until you've selected Option and Type
4) Download Template Button - This will download the Restaurant365 recommended template in a csv file for the record and type you selected. You can either open and edit this template in Excel or make your own template in Excel using an exported list (for updates) that you obtain from a list view in the system. If you do not have a template, it is recommended to click this button to obtain a template with the correct column headers when creating new records. This button is not active until you've selected Option and Type
- Note: The file uploaded must be a csv file. If you create your template in Excel, be sure to choose 'Save As' and select .csv when saving
5) Next Button - This will allow you to move on to the next step after completing all of the fields
Map Fields Tab
This tab ensures that all fields from the template are mapped currently before importing the file.

1) Search - A field where Users can search for a specific map field. In this search box, type the first few letters of the desired field, and the list of fields will be filtered to only the fields that match the entry
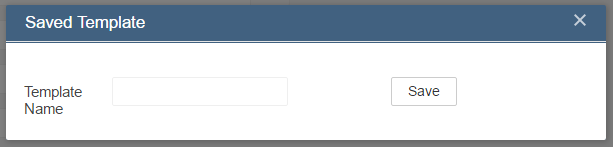
2) Save Mapping Button - This will save a mapping that is typically used, which can be selected on future imports without the need to re-map each time. Pressing this button will open a window where the name for this mapping can be entered and saved

3) Choose a Saved Mapping Box - This allows a past saved mapping to be selected
4) Next Button - This will move to the next step after all of the fields are completed
Import Tab
In this tab, the User clicks the 'Import' button and receives an alert depending on the status of the import: Successful, Partially Successful, or Failed.
Success

If successful, a message will popup to alert the User that the 'File Imported Successfully' along with hyperlinks to the files just imported / updated. To review the information imported, click the blue hyperlink text to open the created records in new tabs.
Partial Success (some lines imported, others failed)

If some of the lines imported, but not all, a pop-up will alert the User that the 'File Imported with *Import Type* Corrections Needed'. The User can click through the hyperlinks to the successfully imported line items.
An additional notice appears above the successfully imported items stating the number of corrections needed along with a hyperlink to download a .csv file with the corrections noted. The User can click on this link to download the .csv file, open it in Excel and make any necessary corrections. The User would then need to save it as a .csv file and then start the Import process again using the corrected file.
Failed

If the import failed completely, the popup will alert the User that 'No Records Imported' and will provide a Corrections List. If no Corrections List is provided, this likely means there was an error with the file / file type or an error with the mapping.
The User can click on this link to download the .csv file, open it in Excel and make any necessary corrections. The User would then need to save it as a .csv file, and then starting the Import process again using the corrected file.
Correction File
The Correction List file is the same file you uploaded, but now contains a new column on the far right titled 'Problem'. The values in this column describe the corresponding lines' error. Notice in the example below the Default Expense Account named 'Test Account' didn't exist in our GL (or there was a spelling error) so the Problem value is 'Missing:Account'.

The Import tool will provide many different errors/problems depending on the issues with your import file. Many of them will be due to the spelling, spacing or punctuation in the names you identify in your import template.
Import Tips & Tricks
When importing a template, the following Tips and Tricks can be used to assist in a successful import:
- Update Available Fields. A User can view all of the fields that can be updated on a template by downloading a blank template, uploading that template back into the Import Tool, and view the mapping listed on the 'Map Fields' tab. This can be helpful since blank templates do not always include all of the fields that can be updated.
- Remove Unused Columns. Before updating a template, ensure to delete any columns that will not be updated. This will help minimize entry errors.
- Review All Columns. Ensure that all items have data listed in the columns. Any items that will not be updated should be removed from the file before import.